As an Amazon Associate, I earn from qualifying purchases.
Do It Yourself Outdoor Pull-Up Bar
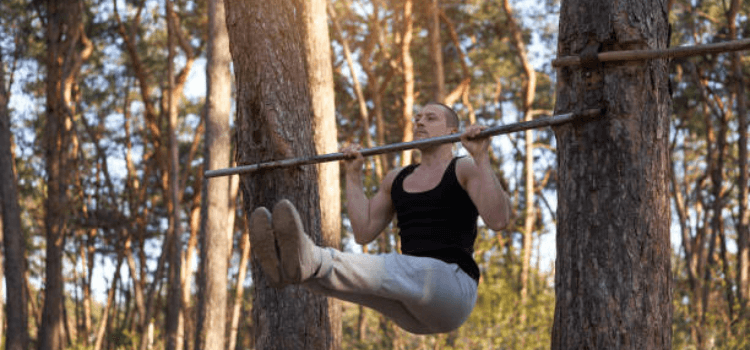
In a world where fitness and well-being have never been more important, the idea of bringing the gym home has taken on new significance. One excellent way to do this is by installing your own outdoor pull-up bar, providing a robust platform for various upper body and core workouts while enjoying the fresh air.You have found the ideal spot if you are thinking about taking the plunge into do-it-yourself fitness. Follow this comprehensive guide to craft your very own pull-up bar that’s as durable as it is economical.
The Importance of Outdoor Fitness Equipment
Creating a space for exercise in the open air has numerous advantages. Not only does it encourage a more regular fitness routine by reducing the idea of a workout as a separate task but it also decreases the costs associated with gym memberships. Additionally, outdoor exercise has been linked to improved mental health, as the sunshine and fresh air can elevate one’s mood and reduce stress.
Benefits of a DIY Pull-Up Bar
Going the DIY route offers a sense of achievement and customization that standard gym equipment lacks. Building your own pull-up bar is a project that’s both practical and satisfying; you get to tailor it to your needs and save money in the process. There’s also the added bonus of knowing you’re supporting your health goals in a novel way, which can be a powerful motivator.
Supplies and Equipment Required
Make sure you have everything you need, including equipment and supplies, before you start. This isn’t an exhaustive list, as the specifics can change depending on the design and existing resources.
Required Materials may include:
- A metal pipe or wooden beam for the actual bar
- Lumber or metal tubes for the supporting frame
- Screws, bolts, nuts, and washers
- Concrete mix for a sturdy foundation
- Applying a waterproof paint or sealer on wood or metal can keep them safe from the weather.
Suggested Tools to consider:
- Measuring tape and ruler
- Drill with appropriate bits
- Saw for cutting the bar and frame material
- Level
- Trowel for concrete work
- Protective gear (gloves, goggles, etc.)
You have considerable leeway in selecting the materials. You can opt for thicker, more durable bars and metal tubes for heavy usage, or you can go with options that may be lighter but still strong enough for personal use. The key is to ensure that whatever you choose, it can comfortably support your weight and is durable against weathering — particularly if it’s exposed to rain and sun for extended periods.
Design and Construction
Step-by-Step Guide
Step 1: Planning
Designing your pull-up bar begins on paper.Before you choose a station, measure the depth of your footing to determine the proper breadth and height. If you’re not sure about the ideal dimensions, consider that a standard pull-up bar is about 10 feet tall and 3 feet wide. Remember to account for installation depth, approximately 1/3 of the bar height for stability.
Step 2: Cutting and Assembling the Frame
If you’re using wood, cut your beams to the desired size. Two beams can be used for the vertical posts, and two shorter ones for the top and bottom of the frame. Verify the squareness of all components using a level. If you’re working with metal, the frame can be welded or bolted together.
Step 3: Preparing the Foundation
You need a strong, stable base. This can be achieved with concrete footings. Dig holes as deep as the frost line in your area then prepare and pour the concrete. Use a level during this process to make sure the footing is even and straight.
Step 4: Attaching the Bar
With the frame in place, attach the bar. For a metal pipe, you might need to use pipe clamps or weld it into place. For a wooden bar, you can drill a hole slightly smaller than the bar and hammer it into place. Ensure it’s secure and even.
Safety and Installation Techniques
- Double-Check Your Frame: Ensure all the components are correctly cut and fitted before final assembly. Any flaws in this stage can compromise the overall structure.
- Weatherproofing: Apply a suitable sealant or weather-resistant paint to all wood components. To prevent decay and other weather-related harm, this procedure is essential.
- Anchoring: The bar should be firmly anchored to the ground, whether with concrete or another sturdy mechanism. A loose or wobbly pull-up bar can be very dangerous.
Customization Options
After the framework is set up, the exciting part can start. You can add extra bars for chin-up variations, parallel bars for dips, or even rings for gymnastic exercises. These additions can be attached to the main structure or designed to be removable, expanding your workout options.
Personalizing the Design
- Personalize with carvings or paint
- Use stencils for inspirational fitness messages
- Add a personal marker such as a family crest or name
Expanding the Features
- Incorporate a step for assisted pull-ups
- Create additional stations for an entire outdoor gym
- Add a shade structure or roofing to protect from weather
Maintenance and Safety Tips
Maintenance
Outdoor equipment requires regular maintenance to ensure its longevity and safety. This includes:
- Inspecting for wear and tear
- Tightening bolts and screws
- Reapplying weatherproofing as needed
Safety
Proper safety should always be a consideration.
- Do a safety check before each use
- Ensure the area around the pull-up bar is clear
- Consult an expert if you have any doubts about the security of your apparatus.
Conclusion
Building a DIY outdoor pull-up bar is an excellent project for the body, the mind, and for your wallet. You can build a sturdy exercise station that will last for many years if you follow this advice. Never delay to begin your fitness journey; doing so is the most crucial step.
Begin your project and feel the satisfaction of completing a workout that you built with your own two hands.
It’s time to grab life by the bar and pull yourself up to a new level of fitness. Share your successful projects online and inspire others to embrace the DIY fitness movement.If you put in the time and effort, you can transform your backyard into your very own fitness haven.
As an Amazon Associate, I earn from qualifying purchases.